
Using Azure Analysis Services to connect via an ODBC Source (Redshift)
I am busy working with a customer and had a challenge when using Azure Analysis Services to connect to Amazon Redshift via an ODBC connection.
The first issue that I encountered was the following error: OLE DB or ODBC error: [Microsoft][ODBC Driver Manager] The specified DSN contains an architecture mismatch between the Driver and Application; AWS PROD. This lead me to a few websites and the one that got me to my solution was Tabular: Error while using ODBC data source for Importing Data
Below are the steps on how I installed, configured and got the connection and refresh working.
The details below should also work for other ODBC data sources too.
NOTE: The first thing I had to do was to make sure I had installed both the 32bit & 64bit ODBC drivers for Redshift
I downloaded it from the following location: https://docs.aws.amazon.com/redshift/latest/mgmt/install-odbc-driver-windows.html
Configuration of 32bit ODBC Connection
Below are the steps to configure the 32bit ODBC Connection.
- I went into my ODBC Data Source Administrator (32bit)
-
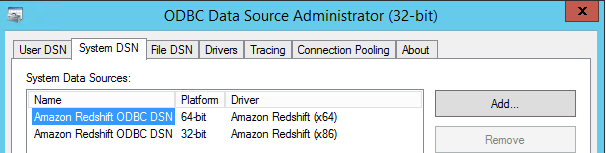
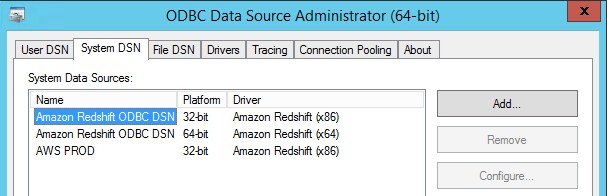
I then clicked on System DSN
- I could then see my existing ODBC drivers installed
-
I then clicked on Add
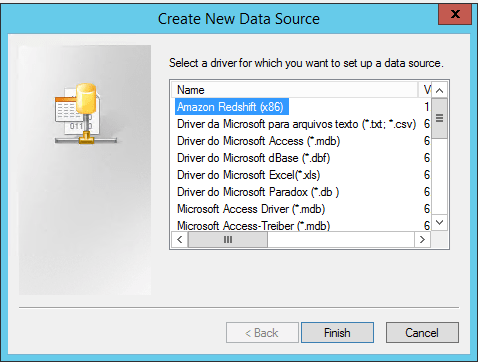
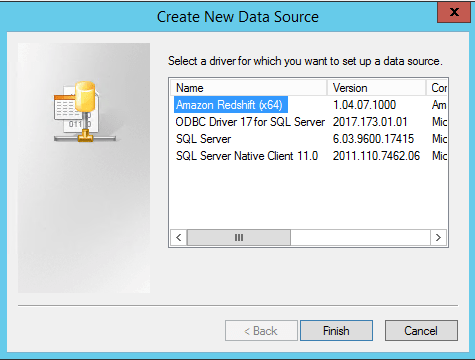
- On the Create New Data Source window I selected Amazon Redshift (x86), then clicked Finish
-
This then opened the Amazon Redshift ODBC Driver DNS Setup
- I then put all the required connection settings

-
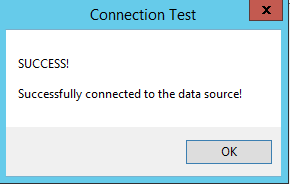
I then clicked on Test to make sure it could connect as expected.
-
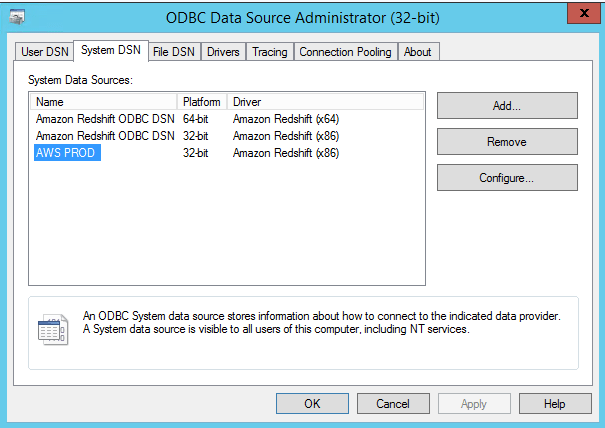
I now completed creating the 32bit ODBC Connection to Redshift, and I could see it in the ODBC Data Source Administrator (32bit)
Configuration of 64bit ODBC Connection
In order to configure the 64bit ODBC connection, I did the following steps below.
- I went into my ODBC Data Source Administrator (64bit)
-
I then clicked on System DSN
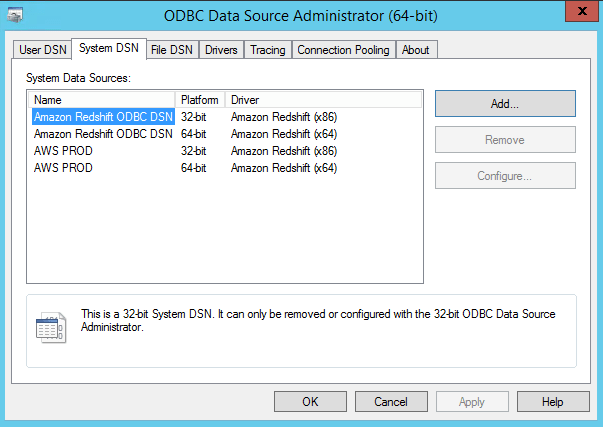
- I could then see my existing ODBC drivers installed
- NOTE: I could see my existing 32bit connection I created in the steps above.
-
I then clicked on Add
- On the Create New Data Source window I selected Amazon Redshift (x64), then clicked Finish
-
This then opened the Amazon Redshift ODBC Driver DNS Setup
- I then put all the required connection settings
- NOTE: It is essential that I named the Data Source Name with the same name as the 32bit Name

-
I then clicked on Test to make sure it could connect as expected.
-
I now completed creating the 64bit ODBC Connection to Redshift, and I could see it in the ODBC Data Source Administrator (64bit)

Conclusion
Now that I had created both the 32bit and 64bit ODBC connections, not only was I able to process and use my Visual studio instance, I was also able to successfully process tables and deploy it to my AAS instance.
Just to re-iterate that I had to make sure that both my 32bit & 64bit ODBC Names had the identical name. The reason is because when creating the data source in Visual Studio (Azure Analysis Services editor) it references the name of the ODBC System DSN.
If you have encountered this or got any suggestions, please let me know in the comments below.
Thanks for reading!
Hello,
I was able to load data from Redshift into a tabular model in Visual Studio and deploy the model to an Azure AS instance. However, when I manually try to process the model from SSMS I get the following error:
Failed to save modifications to the server. Error returned: ‘An error occurred during On-Premise Gateway related activity. Additional error details: DM_GWPipeline_Gateway_MashupDataAccessError
Received error payload from gateway service with ID 2772083: Async operation 831e08d3-9dbe-48cd-b576-7d39e8d271be is faulted with [0]Microsoft.PowerBI.DataMovement.Pipeline.Diagnostics.MashupDataAccessValueException: Mashup expression evaluation error. Reason: .
GatewayPipelineErrorCode=DM_GWPipeline_Gateway_MashupDataAccessError
GatewayVersion=3000.10.248
Reason= —>
[1]Microsoft.PowerBI.DataMovement.Pipeline.Diagnostics.GatewayPipelineWrapperException: Substituted: MashupValueException:Microsoft.Data.Mashup.MashupValueException (0x80004005): ODBC: ERROR [IM002] [Microsoft][ODBC Driver Manager] Data source name not found and no default driver specified
Do you have any idea how to solve this?
Many thanks in advance!
Regards,
Adrian
Hi Adrian,
When you deployed from Visual Studio did you make sure you had both the 32bit and 64bit ODBC Redshift Drivers installed and configured?
You can also double check under Connections that you could see your data source there?
Hi Gilbert,
The ODBC’s (both 32 and 64 bit) on the VM that is hosting the gateway between Redshift and AAS were not properly configured. The credentials somehow disappeared so after configuring both ODBC’s under the system DSN tab again, I was able to process the tabular database with SSMS. Did you also use a gateway?
Hi there
Yes I did use the Gateway to import the data into my AAS model and had both ODBC drivers configured.
I do use BISM Normalizer to deploy the changes so that I do not have to update the data source connection everytime I make a change.
Hi Adrian, I am getting the same error, how did you resolve it? Thank you.