
Power BI – Dynamic Row Level Security – Things you need to know to get it working!
Below I am going to explain some of the caveats that you need to be aware of when implementing Dynamic Row Level Security (RLS) in Power BI. Without this I
could not get Dynamic RLS security working for me and my data.
I found that there are a few things that are currently not mentioned anywhere and it took me some time to gain an understanding. So I am hoping that with this blog post it will make it easier for you to implement Row Level Security using Dynamic Security.
Below is the link to a blog post by Kasper De Jonge in which he explains how to very quickly get up and running with RLS, as well as providing a sample Power BI Desktop Model.
Power BI Desktop Dynamic security cheat sheet
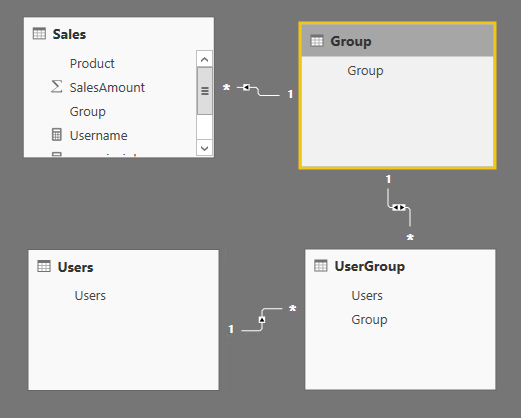
And this is what the Relationship Model looks like, which will make the explanation below a little easier to understand.
Things you need to Know!
Below are the things that I learnt and that will help with understanding the bits that make it all work together.
Testing RLS in Power BI Desktop
The first thing that you will need to update if you have downloaded Kasper De Jonge’s Power BI Desktop model is for in the relationships area. This is because it is missing a key tick box, which without it the Dynamic RLS will not work.
- Go into the
 (Relationships) area in the Power BI Desktop model.
 -
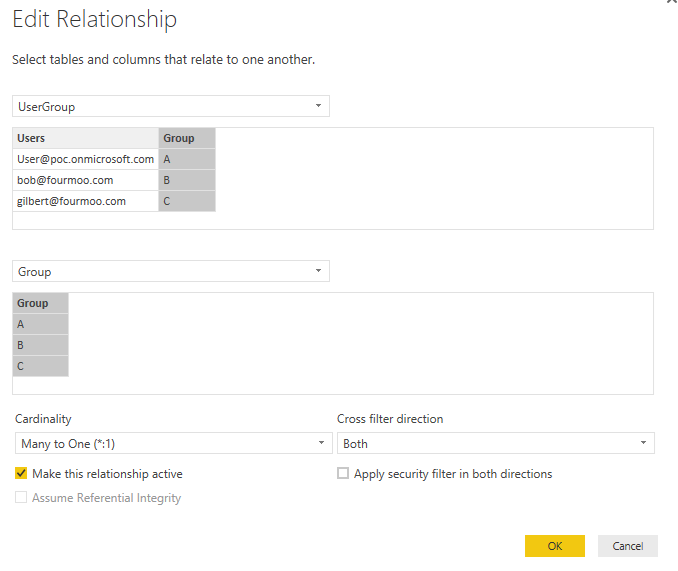
Then edit the relationship between the UserGroup and Group Table, when opening you will see the following below.
-
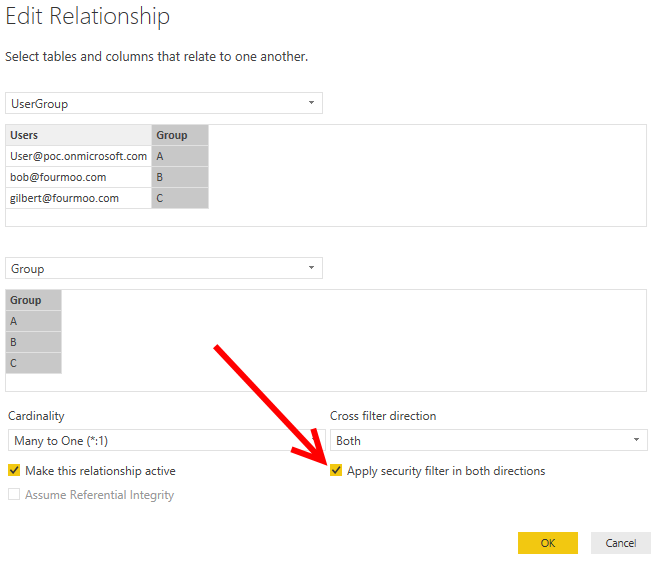
Now in order for this to work, you will need to apply the tick next to “Apply security filter in both directions”
- NOTE: If this is not enabled or ticked the Dynamic RLS will not work correctly.
-
So once done it will now look like the following below:
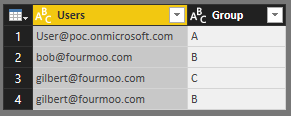
The next thing to note is if you want to test RLS in Power BI Desktop you have to ensure that you have included yourself in both the Users and UserGroup
Table.
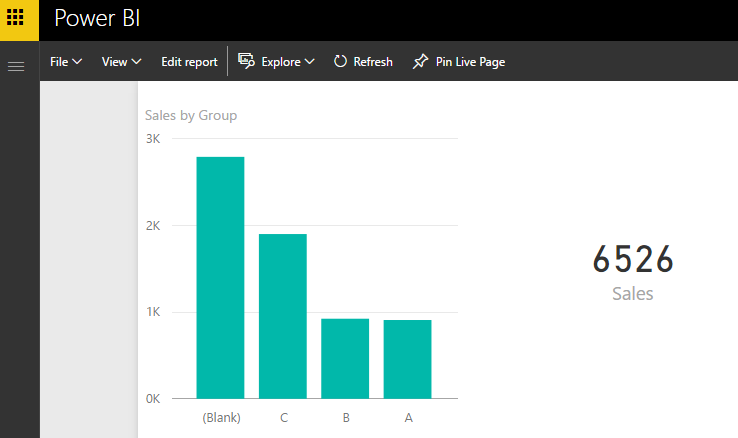
If not, you will get the following screen when click on the  button.

As you can see above the Bar Visual is Blank and the Sales Amount is Blank. This is because with my current login context I am not specified in any of the Dynamic RLS tables.
Which lead me onto the next piece in understanding how the Power BI Service works.
Testing RLS in the Power BI Service
What happened was when I was initially testing this, I put in myself as a user and then a fellow
worker as a user in both the Users and UsersGroup table.
I then uploaded the Power BI Desktop file to the Service. Once it was uploaded I went into the Security for my dataset and put in name under the Roles.

Now what I expected to happen is that when I went into the report I should only see the data for Group B and Group C, the reason is because in the UserGroup table I had rows for Group B and Group C
But when I went and viewed the Report I saw the following below. As you can see I can see all the data and NOT Group B and Group C.
This took me quite a to understand and I did try a whole host of things to get it working.
This is unconfirmed by Microsoft but my own conclusion was that because I am the person who is uploading the Power BI Desktop model into the Power BI Service, I must by default have Admin (Server Administrator) rights to the model.
So no matter what I do, I will always see everything. Which makes perfect sense because I am the author of the model.
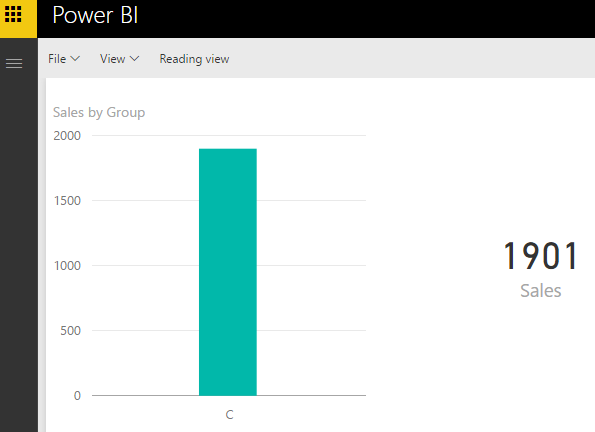
So to test this I then shared my Dashboard with another user who only had access to Group C, and when he viewed the dashboard as well as the reports he saw the following below. (NOTE: I did add his email address under Security in the Dataset)
Conclusion
Whilst it is great to now have Dynamic RLS in the Power BI Service I did struggle for some time to get it working, as well as to understand how it all pieces and works together.
And since I now know the above information I have been able to successfully roll out and test other Power BI Models successfully.

This was the missing link for me. Very helpful information and completely missing from all other tutorials. Thank you.
Glad it helped you out.
if it is Dynamic ,why you have to add his name in security section,once he login he can able to see his data only right?
Yes that is correct, as long as the RLS is setup they will only see the data related to them. You can test this in the Power BI Desktop File
i mean if i have 50 users do u want me add those 50 users,then it is not dynamic right,can you please help to configure dynamic security in power bi
Hi there, currently yes you would have to add them into your table in Power BI, as well as then add them in the Power BI Service under the Security setting on your dataset.
Hi There,
What DAX Expression are you using in the Manage Roles for setting up RLS in Desktop?
Hi Jennifer,
I have got a great blog post explaining how to setup and configure Row Level Security, which also includes the DAX expression
Dynamic Row Level Security is easy with Active Directory Security Groups
Thank you, this has been very helpful in creating my basic dynamic RLS. Now I have a situation in that my business has changed. I have to have RLS based on two different fields. I have a Team field that is based on Cost Center and I have a Report to field based on who I report to. I need it so that I can see Team data for the team I belong to by Cost Center (Bobs team/Cost Center 1001) but also all of the people that report to me even if they have a different Cost Center (Bobs team/Cost Center 1002 and/or Steves team/Cost Center 1003) so I need to find a way to apply RLS with an “OR” statement that can grab a field value from a Team Field and a Reports To field. Any suggestions?
Hi there, this most certainly can be done, I have done it in the past and it just depends on how your RLS is structured.
Below is a link from Reza Rad in which he details all the different RLS patterns and I think that possibly one of them could solve your issue?
Reza Rad – RLS Patterns
If that does not assist you please let me know.